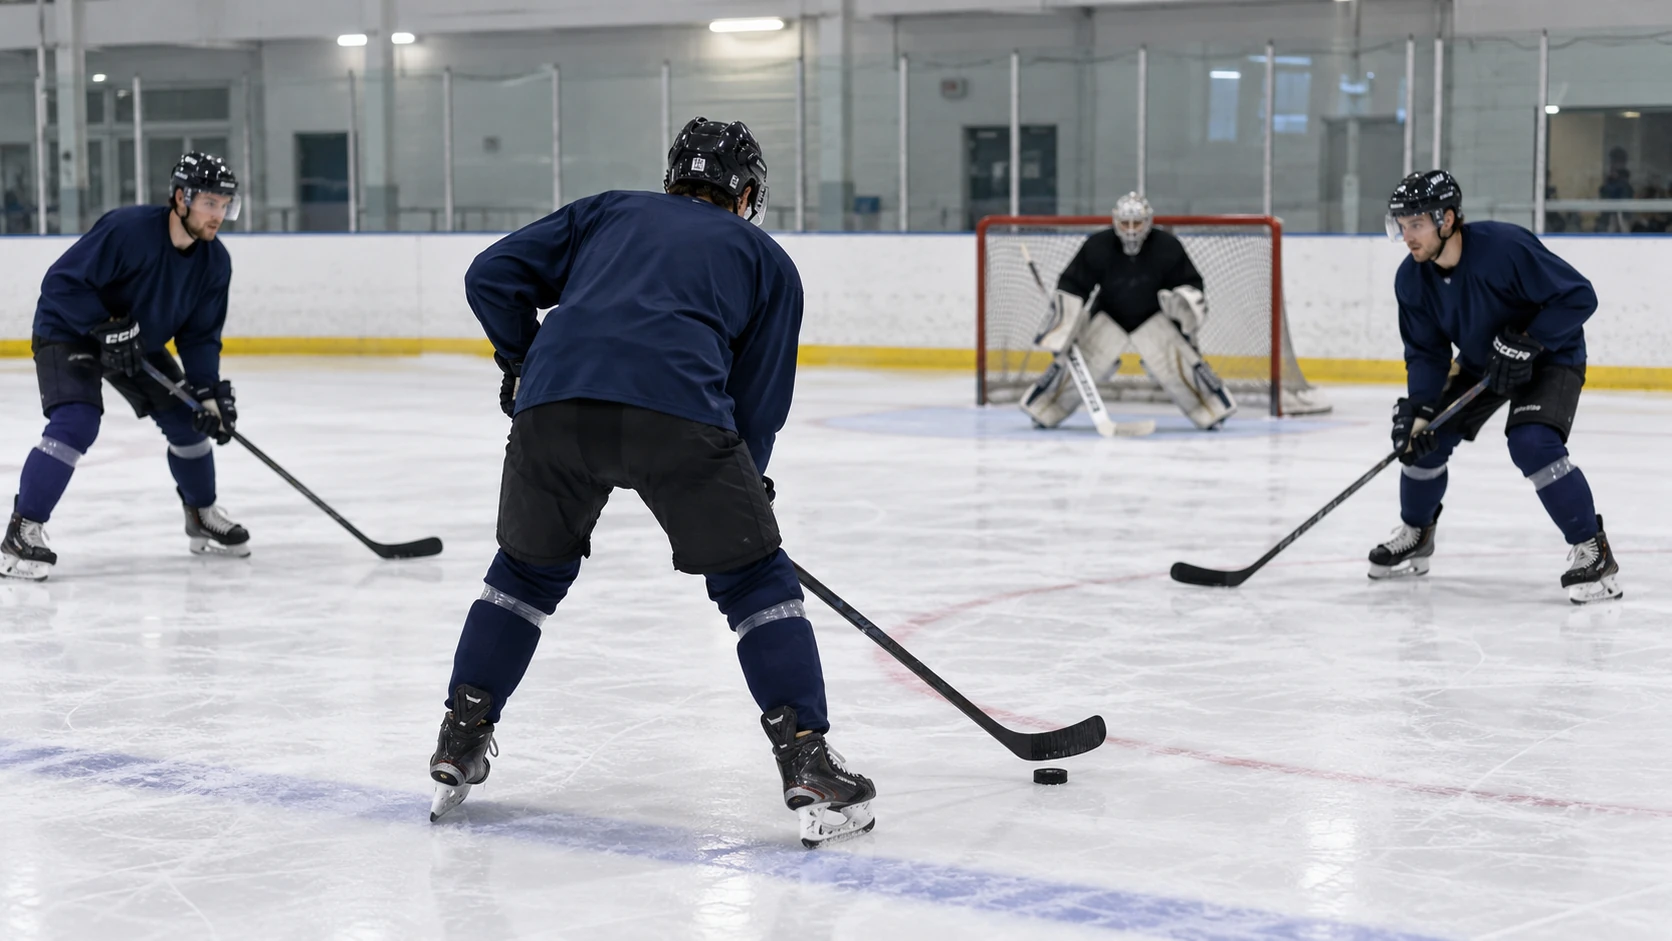
At normal five-on-five strength, a hockey team has a center, two wingers, two defensemen and a goalie on the ice. The center and wingers are forwards; the five skaters move and defend together. Positions describe responsibilities, not places where players must remain. Learn the names first, then watch how the roles connect when possession changes.
The Six Hockey Positions at a Glance
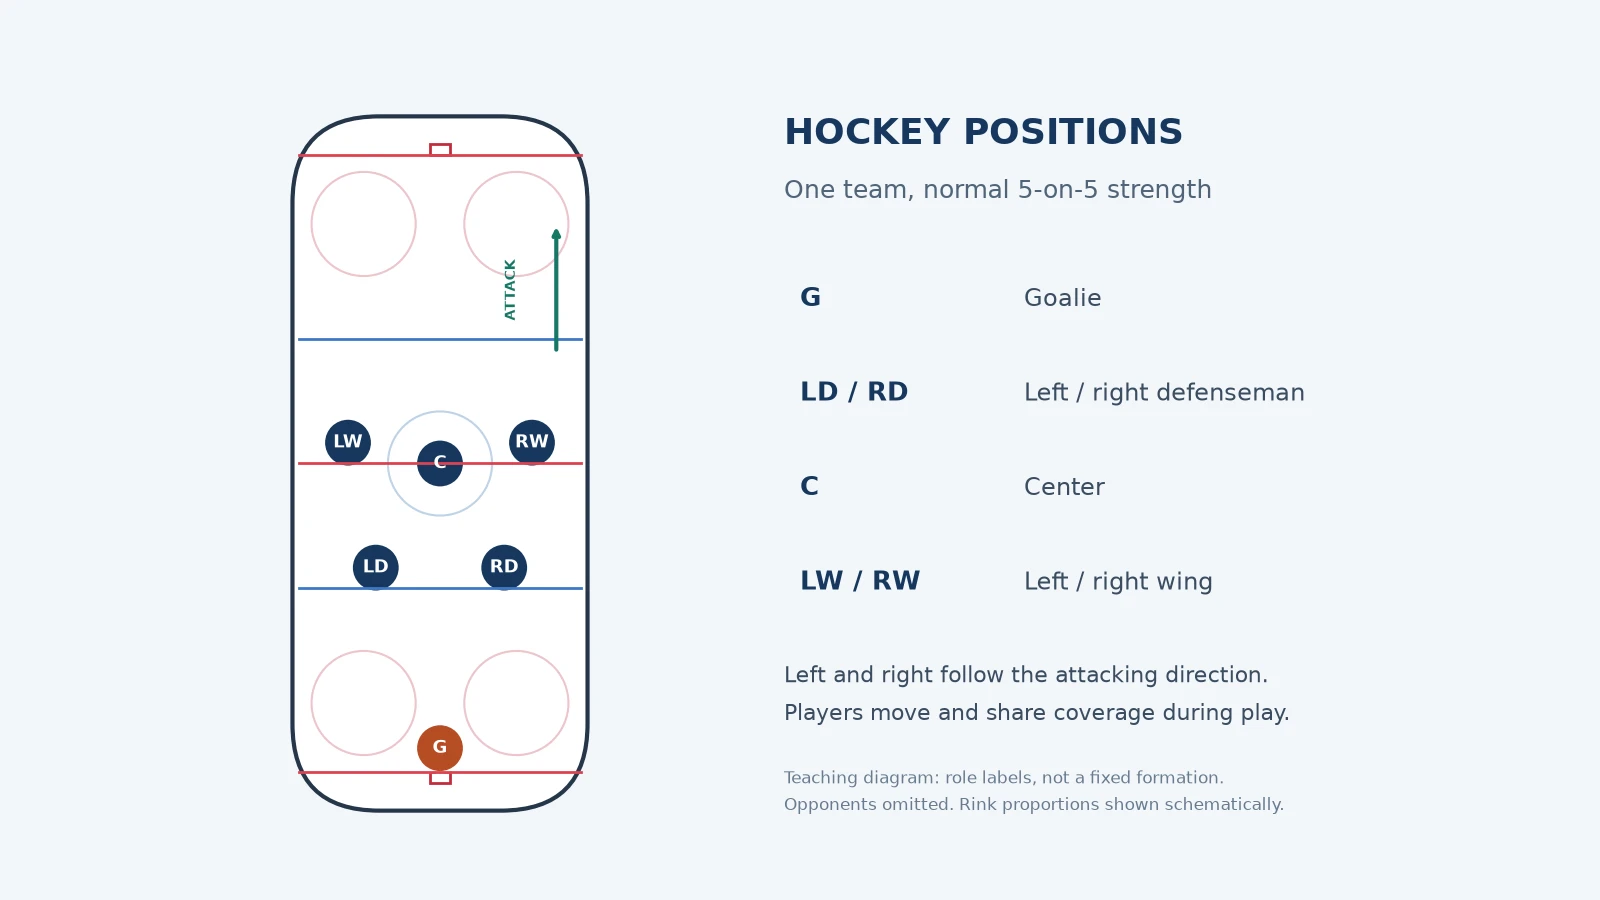
There are six players per team in the familiar even-strength setup, but only five are skaters. That is why a broadcast calls it five-on-five even though each goalie is also present. The standard labels are center, left wing, right wing, left defense, right defense and goaltender. A roster may combine the two defense positions under a single D.
| Position | Common abbreviation | First thing to watch |
|---|---|---|
| Center | C | Support through the middle |
| Left wing | LW | Wide support and puck recovery |
| Right wing | RW | Wide support and scoring options |
| Defense | D, LD or RD | Space between the puck and the net |
| Goaltender | G | Shot angle and rebound control |
A useful beginner's question is not simply where a player stands. Ask what option that player provides. Someone without the puck may be offering a safe pass, drawing a defender away, guarding a dangerous lane or preparing to recover a rebound. Those actions can matter before a shot or tackle makes them obvious.
Read Left and Right in the Attacking Direction
Read left and right as the team looks toward the opponent's goal. Do not use the left edge of your television as a permanent reference. The camera changes, teams change ends, and a winger can cross the ice during a play. The labels provide an orientation for the team, not a restriction on every movement.
The side of the ice is also different from shooting handedness. A player's stick blade and preferred passing or shooting angle can influence deployment, but a left-shot player is not automatically a left winger. When reading a lineup, keep the position label and the shooting hand as separate pieces of information.
Use the diagram to locate roles, then allow them to move. A defender may join an attack, and a winger may retreat into space that defender left. Recognizing that exchange makes hockey look more organized. The test is whether teammates cover the important options as the play develops, not whether every player stays beside a printed label.
Forwards: How Centers and Wingers Work Together
A forward line usually brings together a center and two wingers. Their shared job is to help the team create chances while still supporting the puck when possession changes. For a new fan, the useful question is not simply which forward has the puck. Look for the other two: is one offering a short pass, stretching the defense or finding space near the net? The movement away from the camera's main subject often explains why the next pass works.
The Center Connects the Play
The center is usually the forward taking faceoffs and helping connect teammates through the middle. The WBS Penguins' position guide identifies those linking and defensive responsibilities. That does not mean the center must lead the team in goals or carry the puck on every attack. A center can make a possession work with a timely supporting route that barely appears in the highlight.
Imagine a defenseman picking up the puck behind the team's net. A center skating nearby can give that teammate a shorter passing option rather than leaving only a difficult long pass up the boards. If the defenseman passes to a winger instead, the center can move toward the receiving player and become the next option. That triangle is an example of support, not a compulsory pattern used by every club on every shift.
On defense, watch whether the center helps protect the dangerous space in front of the goal. A player who skates into the corner to chase the puck may create an opening somewhere else, so coverage must be shared and adjusted. You do not need to identify a coach's entire system to appreciate this. Pause a replay just before a pass into the middle and look for the closest supporting forward.
Faceoffs provide an easy starting point for recognizing the center, although another player can take a draw. After the puck drops, stop treating the spot at the dot as that player's permanent home. Follow the next few seconds instead: does the center offer an outlet, join the attack or recover toward the team's own end? Those choices reveal the role more clearly than the roster abbreviation alone.
Wingers Create Width and Support the Puck
Left and right wingers often give an attack width, making it harder for defenders to cover every option in one small area. But a winger can cut toward the goal, work behind the net or rotate into space vacated by another teammate. The label tells you a usual assignment, not a boundary that the player may never cross. A right-handed shot can play left wing, and a left-handed shot can play right wing.
For a simple viewing exercise, watch the winger farthest from the puck. That player might provide a passing target on the other side or move toward the net as a teammate attacks. If both wingers crowd the puck carrier, the opponent can often defend a smaller area. Space matters because it creates decisions for the defenders: stay with a potential receiver or move toward the player carrying the puck.
Wingers also compete for loose pucks and help recover possession. A forecheck is pressure on opponents trying to move the puck out of their end; a backcheck is the effort to track back as opponents attack. A winger turning and skating hard toward a developing threat is doing important defensive work even if the broadcast has already followed the puck ahead.
Near the opposing goal, look for screens, deflections and second chances. Hockey Canada's scoring guidance includes those situations. A forward occupying a defender or obstructing the goalie's view may contribute to a goal without receiving the final pass. These are actions that different players can perform; they are not extra positions on the lineup sheet.
Defensemen: Protect the Middle and Start the Attack
A normal five-skater group has two defensemen, usually described as a defensive pair. Their name can make them sound like players who only wait for an opponent to arrive. In practice, their decisions often shape the beginning of the next attack. Forwards help defend, and defensemen help create offense. The useful distinction is the responsibility a player carries within the group, not permission to participate at only one end.
Without the Puck
Start by watching the space between an approaching attacker and the nearest defender. The broadcast may call this the gap. A defender who gives away too much room may allow an attacker time to choose a shot or pass; one who commits too early may be beaten. The distance changes with speed, nearby support and where the play is happening. There is no single number of feet that explains every good decision.
Next, look toward the middle. A defender can influence an attack by directing the puck carrier toward less dangerous space or putting a stick across a passing route. Those moments are quieter than a big body check but can prevent a chance before a shot exists. If you judge only by hits, you may miss the player who kept an opponent from making the intended pass.
For an original viewing example, imagine two attackers approaching one defender. Watch both the puck carrier and the possible receiver rather than immediately blaming the defender for backing up. The player must respond to more than one threat, while the goalie and recovering teammates also affect the decision. On the replay, identify where the extra attacker appeared and whether anyone was skating back to help.
With the Puck
A clean first pass can turn defensive recovery into forward movement. Hockey Canada's defence guidance emphasizes puck recovery, breakout decisions and teammate communication. A breakout is the team's effort to move the puck out of its defensive zone with useful possession or support. Watch whether the next player can receive the pass comfortably, not only how far the puck travels.
At the other end, a defenseman may work near the attacking blue line, an area often called the point. From there, the player can keep a possession alive, pass to a teammate or put a puck toward the goal. A point shot is not automatically a great chance: traffic, a deflection, a rebound or a better available passing option all change what the play produces.
When a defenseman joins an attack farther down the ice, look behind the puck for coverage. Someone else's support may make that move possible. That is a better viewing habit than assuming a defenseman crossing into a scoring area has forgotten the job. Conversely, an exciting offensive move still needs to be judged alongside the space left if possession is lost. Read the entire play, not just the final shot.
The Goalie Does More Than Stop Shots
The goalie, listed as G, is the easiest position to recognize because of the larger protective equipment and the job of defending the net. Watch the painted crease in front of the goal, but do not assume the goalie stays on one mark throughout a possession. Movement is part of the work: the netminder must follow the puck as the shooting angle changes and be ready for the next possible attempt.
Hockey Canada's goaltending explanation highlights skating, positioning, puck tracking and puck handling. Those skills help explain why a save is more than a last-second reaction. A goalie can make a difficult play look routine by arriving in a useful position before the shot. A dramatic scramble may instead begin with a pass or rebound that forced several rapid adjustments.
Try watching a replay from the goalie's perspective. Identify the puck before the shot, then look for traffic between it and the net. If a pass crosses the ice, follow how far the goalie must move before facing the new shooter. This does not tell you whether every technique was perfect, but it gives you much more information than a still image of the puck entering the goal.
Also watch what happens after the first save. A puck that comes back into play is a rebound, and teammates have to respond to it. The goalie may recover for another attempt while defenders try to reach an attacker or the loose puck. A second-chance goal is therefore a sequence involving several players. The final touch alone does not explain every earlier decision.
Puck handling adds another layer. Imagine a puck sent around the boards behind the net: a goalie who stops it can give a defender time to receive it rather than chase it. A hurried or misunderstood exchange can also create pressure. Listen for communication when the broadcast microphones pick it up, and watch whether teammates provide an outlet. The netminder participates in the team's movement of the puck as well as its shot prevention.
Why Positions Look Different During a Game
Before trying to identify a formation, check how many skaters each team has. The score graphic may show a power-play clock or a strength label such as 5-on-4. Counting skaters first prevents a common misunderstanding: a team using fewer forwards during a penalty is not necessarily playing its normal line badly. The situation has changed the group's jobs.
Lines, Defensive Pairs and Shift Changes
A line usually means a group of forwards used together, while a pair means two defensemen. Coaches can change those combinations for a matchup, an injury, a penalty or a different tactical choice. A lineup shown before the game is a helpful guide, not a promise that every shift will have exactly the same teammates.
A shift is one player's stretch on the ice before being replaced. Hockey allows changes while play continues, so you may see players heading to the bench while teammates jump into the developing play. The Kraken's line-change feature explores that timing. On television, follow the puck and then briefly check the bench side: a fresh player may explain where the next supporting option came from.
Changes also offer a useful way to appreciate a quiet decision. Imagine a tired winger moving the puck into a safer area before heading off. The immediate result may not be a shot, but the team can replace a player without leaving an opponent an obvious opening. This is a viewing example, not a rule that every change requires the same play. Puck location, possession and nearby pressure all matter.
Power Plays and Penalty Kills
A power play means a team has a numerical advantage because of the opponent's penalty; the shorthanded side is on the penalty kill. A common situation is five skaters against four, with a goalie at each end. Penalty combinations can produce other strengths, so read the actual display instead of assuming every whistle leads to the same arrangement.
Power-play jobs may look different from five-on-five positions. Watch who distributes the puck high in the zone, who offers a shooting option on either side and who works near the net. Teams can choose different mixes of forwards and defensemen. Seattle has documented a five-forward power-play option. Do not treat the normal three-forward, two-defenseman picture as a required power-play lineup.
For the penalty kill, observe how players protect dangerous passing routes and respond when the puck moves. The puck carrier may appear to have plenty of room while the most useful pass is covered. If the defending side gets the puck out, look for the opportunity to change players and reset. These observations are more revealing than assuming four penalty killers should each occupy one permanent corner of a square.
Overtime and the Extra Attacker
Under the 2026–27 NHL rulebook, regular-season overtime normally uses three skaters and a goalie per team for up to five minutes. Penalties affect the strength. With fewer skaters, space and possession become especially noticeable, and coaches select combinations without reproducing a full five-on-five line and pair. Stanley Cup playoff overtime uses a different format; our playoff-format guide explains that setting.
An extra attacker appears when a goalie is replaced by a skater. The team gains another passing or shooting option but leaves its net unguarded. This is not automatically a power play: the additional skater can come from a substitution rather than an opponent's penalty. When the goalie heads toward the bench, count the skaters again and notice how the team balances pressure near the opposing net with the risk of losing possession.
Follow One Play to See Every Role
Choose a game from today's NHL schedule and give yourself one small task: watch a single possession from the team's own end to the other blue line. The first time, follow the puck as usual. During a replay, pick one teammate away from it. You will often see why the puck carrier had an option or why the attack stalled.
Looking around matters to the players too. Hockey Canada's scanning guidance identifies teammate location and opponent pressure as useful information. For a spectator, those same two questions create a manageable viewing exercise. You do not have to memorize every system name or identify all ten skaters at once.
A Simple Breakout Example
Imagine this sequence; it is a teaching example, not a reconstruction of a particular NHL game. An opponent sends the puck around the boards. The goalie stops it behind the net and leaves it for a defenseman. The other defenseman offers an option across the zone, so the recovering player does not have to force the first available pass toward pressure.
A winger moves into space near the boards and receives a pass. The center comes close enough to offer a short next pass, while the far-side winger keeps another route available. If the opponent pressures the receiving winger, the center might help move the puck onward. If that route is covered, the supporting defenseman could become an option for restarting the attempt. The value is in having choices.
Now imagine the puck being lost. Those same forwards must respond to the opponent's attack, and the defensemen must read the new threats. The winger who was stretching the ice a moment earlier may need to turn back. The center's next action may be to support coverage rather than ask for another pass. Roles change with possession, even though the names on the roster remain the same.
Your takeaway from the example should be the connection between players, not a compulsory order of passes. Teams use many ways to exit their zone, and an opponent can disrupt any plan. When a commentator praises support, spacing or a first pass, try finding the teammate whose route made that action possible. Then use the week's schedule to watch the same role in another game. Comparing ordinary possessions is a practical way to understand hockey positions without waiting for a spectacular goal.
Comments
Comments are reviewed before publication. Spam, abusive content and policy-violating links are not published.
Sign in with Google to leave a comment.
Loading comments...